Create Activity
After creating the Campaign, it will be directed to Activity page.
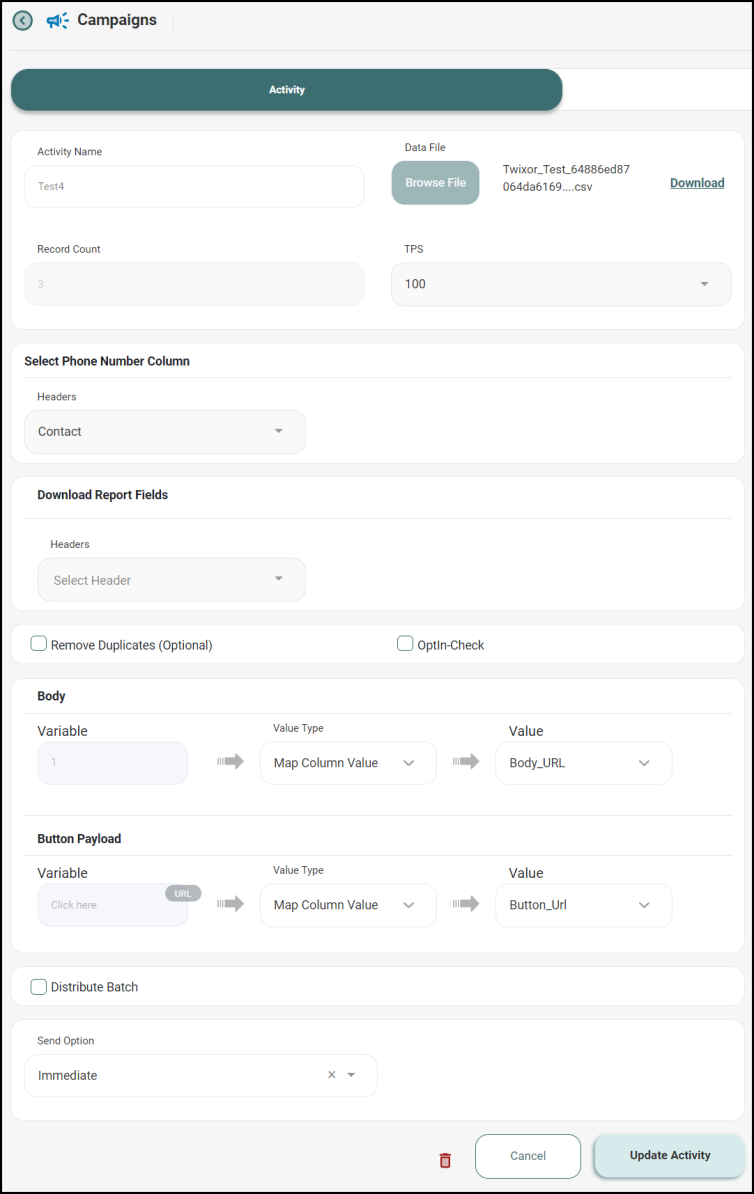
1. Click Create New Activity button and enter the Activity name.
2. Click Upload File button to upload the base excel file. It includes mobile number, value for body variable and dynamic URL variable.
Info!To add the mobile numbers in the data file, enter the mobile number as ‘+919874677344 to store it as text.
Upload and run the test file before running the actual file to make sure all the data is captured like, sent, delivered, failed, read and the button clicks. If any of the above is not captured then please get all the events enabled from the respective person who has raised the campaign request.
3. To share different media with each user, store images in a distinct column with unique URLs in your data file. This way, you can send multiple images to multiple users.
Info!Ensure the images are publicly hosted and have accessible URLs for everyone.

4. Once the data file is successfully uploaded, the total records present in the excel will be fetched and displayed shown in the Record Count.
Info! Data file can be uploaded as either csv or zip file.
5. Select the TPS (Transaction Per Second) to send the message.
Info! By approximate, it will take around 9 minutes to send the message for 50,000 people. Maximum time seconds in TPS is 100 sec.
6. Map the desired column name for phone number/mobile number from the data file in the "Headers" field under Select Phone Number Column.
7. Additionally, include the field name in the "Download Report Fields" to export the selected data in campaign reports.
8. Map the Media variable as images which you have given in the data file.

9. Map the variables we have given in the base file in Body Variable and Value with Value Type as Map Column Value. You can also give constant value to the assigned variable by selecting Assign Constant Value drop-down.
Basically, the variables defined in the message template are mapped against the column headers in the Data file. Also, we can assign a fixed constant value to one of the variables if it remains constant across customers (For example: Gold Rate for the day for a jewellery campaign).
10. In the message template, the variables assigned to the CTA button can be mapped under the Dynamic URL Variable.
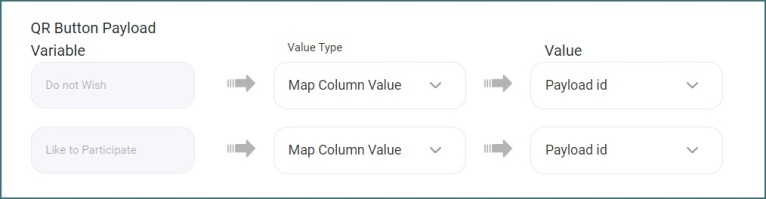
11. When you run campaigns, you attach important information to buttons. Imagine this information as Payload id, and you organize them in a special column in your data file. For example, if you have different orders, you assign a unique label to each order in that column.
Think of it like having a special "Payload id" column in your data file. You assign unique labels (IDs) to things, like orders.
Imagine you're a delivery agent with many orders. Each order has a unique label. When you click the "Deliver Now" button for a specific order, you're actually using its unique id.

When you start your campaign, you can map the variable (payload id) to the QR button payload.
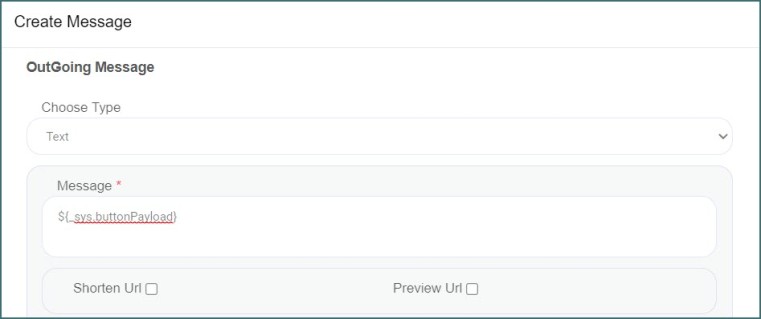
And you can use this payload id to find out an order's status using this syntax ${_sys.buttonPayload} in message node.
12. Enable Distribute Batch check box and enter the batch size (number of records in each batch) and time interval to send messages for each batch.
13. Choose the Send option when to send the campaign: immediately or at the scheduled time.
14. After filling out the information click Create Activity.
Info! Click Campaign Estimate to view the estimation time and record counts for each batch.